Skip to content

Country/region

Europe

    Asia

      North America

        User Guide_XREAL One Serise

        Written by: XREAL_FN

        |

        Published on

        Power Up the Glasses

        1. Cables

        👓: One end of the cable’s elbow connector attaches to the glasses, allowing you to lie down comfortably.

        2. Compatible Devices

        Ensure that your device’s port supports DP video output via Type-C.


        • If you already own XREAL glasses, you can plug the device in to test;
        • If not, try a quick Google search to roughly check if your device is compatible.

        2-1 Connecting Android Phone / Tablet

        • Devices with a Type-C port that supports DP video output can be directly connected to the glasses, which will draw power from the device.

        • Under normal viewing conditions, a fully charged Android phone or tablet can support 4-6 hours of use.

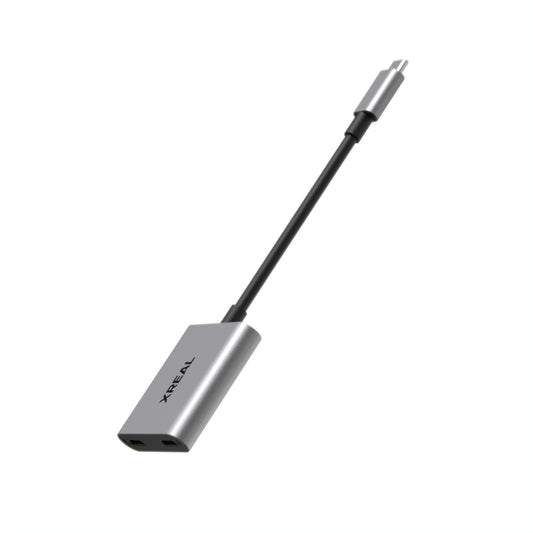
        • To avoid battery anxiety, you can use the XREAL Hub for simultaneous charging and usage.

        2-2 Connecting iPhone

        • iPhone 15 and later series (with a Type-C port)(iPhone 16E excluded) can be directly connected to the glasses.

        • Under normal viewing conditions, a fully charged iPhone can support 4-6 hours of use.

        • For extended use, pairing with the XREAL Hub is recommended.

        2-3 Connecting Laptop

        • Devices with a Type-C port that supports DP video output can be directly connected to the glasses, which will draw power from the device.

        2-4 Connecting Nintendo Switch

        • The glasses cannot be directly connected to the Switch. 

        • Due to voltage limitations on the Switch’s Type-C port, when connecting directly to the glasses, you need to use the XREAL Hub along with a power supply or power bank.

        2-5 Connecting SteamDeck / ROG Ally

        • SteamDeck / ROG Ally can be directly connected.

        • Under typical gaming scenarios, a fully charged console can support 4-5 hours of use.

        • To avoid battery anxiety, you can use the XREAL Hub for simultaneous charging and usage.

        2-6 Connecting PlayStation / Xbox (HDMI Port)

        • For PS and Xbox, an HDMI adapter and an HDMI to USB cable are required. 

        2-7 Connecting PC (HDMI Port)

        • For PC, an HDMI adapter and an HDMI to USB cable are required. 

        ·-·

        Adjusting for the Most Comfortable Fit

        1. Insert Prescription Lenses (Myopia/Hyperopia/Astigmatism)

        Although the lens fitting process may be a bit cumbersome, it's well worth it for those with vision issues, as it ensures clear vision and better eye protection.


        • If you haven't had your lenses fitted yet, we recommend using XREAL’s partner.

        👓: The lens frame models differ among the XREAL One, One Pro, Air 2 series, and Air.

        2. Adjust the Nose Pads

        The One series offers three types of nose pads:

        • S: Suitable for high nose bridges
        • M: Suitable for medium nose bridges (default)
        • L: Suitable for low nose bridges

        👓: You can fine-tune the fit by adjusting the metal frame.

        3. Adjust the Temples

        Adjust the temple angles through three settings to ensure the glasses fit your eyes and ears perfectly, delivering a complete display.

        ·-·

        Buttons and Main Menu

        The buttons are located on the top and bottom of the right temple.


        • Double-click the X Button to activate the main menu.
        • Use the +/- Button to navigate through menu options.
        • Click the X Button to confirm or to access the next menu level.
        • In the menu, double-click the X Button to go back to the previous level.
        • The Quick Button is a customizable function button.

        ·-·

        Screen Settings

        1. Electrochromic Mode

        The electrochromic function provides a richer immersive experience in various lighting conditions.

        • Default Button: Located below the right temple's +/- Button, long-press either side to activate Electrochromic Mode.
        • Adjusting Electrochromic Mode: Once in Electrochromic Mode, click the +/- Button to cycle through three levels. The setting will be automatically confirmed after 1 seconds.
        • You can set the Quick Button to activate Electrochromic Mode. (Please navigate to Quick Button Settings)

        2. Two Screen States

        The system offers two screen modes: Anchor and Follow. Simply click the X Button to switch between these modes.

        These two mode settings will be saved until the next use.

        2-1 Anchor

        • Fixes the screen in mid-air. 

        • Long-press the X Button to reset the screen's position directly in front of you.

        2-2 Follow

        • Fixes the screen in front of your eyes.

        • You can toggle between fixed and smooth follow modes:
          • How To: Double-click the X Button to open the menu > Display interface > Stabilizer, click the X Button to turn this feature on or off.

        3. Four Screen Modes

        3-1 Default Screen Mode

        Every time you connect your device, the default display is set to a 16:9 screen.

        3-2 Ultra-Wide Mode

        • Ultra-Wide Mode is only available on select devices.

        • How To: Double-click the X Button to open the menu > Display interface > Ultra-Wide Mode, click the X Button to activate it.
        • Set the glasses screen to extended Ultra-Wide Mode (instead of mirrored Ultra-Wide Mode) : disable screen mirroring in your computer’s display settings.

        • The system does not retain the Ultra-Wide Mode setting until the next reconnection. You can set the Quick Button to instantly activate Ultra-Wide Mode.(Please navigate to Quick Button Settings)

        3-3 Side View Mode

        • Side View Mode allows you to focus on the screen while attending to other tasks.

        • How To: Double-click the X Button to open the menu > Display interface > Side View Mode, click the X Button to turn it on or off.
        • Adjust Side Window Position: The side window can be positioned in the top of the two corners of the screen.
          • How To: Double-click the X Button open the menu > Display interface > Side View Mode > Left Side / Right Side, and click the X Button to confirm.

        3-4 3D Mode

        • 3D Mode is only available for 16:9 screen sizes.

        • How To: Double-click the X Button to open the menu > Display interface > 3D Mode, and click the X Button to activate it.

        👓: Requires compatible 3D content and the VLC Player app.

        • The system does not retain the 3D Mode setting until the next reconnection. Set the Quick Button to instantly activate 3D Mode.(Please navigate to Quick Button Settings)

        4. Adjusting Screen Size and Distance

        • Default Setting: The default screen distance is 4 meters, with a size of 147 inches (100% FOV).

        • How To: Double-click the X Button to open the menu > Display interface > Screen Size / Screen Distance, Use the +/- Button to make adjustments, and click the X Button to confirm.

        👓: In Anchor mode, it is recommended to set the screen slightly smaller than the FOV edge (to avoid any part of the screen being cut off). For example, when using the XREAL One at a 4m distance, adjust the screen size to 117 inches (80% FOV).


        • The adjustable screen size range:

        5. Adjusting Screen Brightness

        • How To: Use the +/- Button at the bottom of the right temple, and click the +/- Button to adjust the brightness.

        ·-·

        Audio Settings

        1. Switching to Glasses Audio

        • Mobile : No need to switch; it automatically uses the glasses audio once connected.

        • Computer : Use your computer's volume controls and select XREAL One/Pro.

        • Gaming Consoles: For devices like Nintendo Switch, PlayStation, Xbox, etc., set the audio protocol to DP Mode.
          • How To: Double-click the X Button to open the menu > Sound interface > Audio Protocol, and select DP.

        👓In DP Mode, the connected device cannot adjust the volume; please adjust it via the main menu > Sound interface > Volume.

        2. Volume Adjustment

        • General Adjustment: Typically, you can use the connected device's volume buttons or adjust via the main menu(the latter is optional).

        • If the audio protocol is set to DP Mode, you must adjust the volume through the main menu.
          • How To: Double-click the X Button to open the menu > Sound interface > Volume interface.

        3. Connecting Bluetooth Headphones

        • When using a PC, once the Bluetooth headphones are connected, you can select them as the audio output device via the sound control center

        • When using a mobile device, the audio will automatically switch to the Bluetooth headphones once they are connected.

        4. FAQ - Unable to Adjust Volume

        • The audio protocol might be set to DP Mode. You need switch to UAC Mode.

        • How To: Double-click the X Button to open the menu > Sound interface > Audio Protocol interface, and select UAC.

        ·-·

        Pro-Level Settings

        1. Quick Button Settings

        • Quick Button is the short button above the right temple.

        • Default Functions: 
          • Click: Switch to Transparency Mode (turns off the display).
          • Long Press: Customizable function.
        • How To: Double-click the X Button to bring up the menu > Quick Button interface > Click/Long Press interface, choose the desired custom function (including Transparent Mode, Ultra-Wide Mode, 3D Mode, Audio Switching, and Electrochromic Mode).

        2. Adjusting the Interpupillary Distance (IPD)

        Sometimes the virtual image may appear blurry, incomplete, or cause eye strain, which could be due to a mismatch in the IPD. For a more comfortable experience, we recommend adjusting the device's IPD to match your own.

        • Default Setting:
          • One: 64.5mm (Supported range: 59.5mm - 70.5mm)
          • One Pro_M: 63mm (Supported range: 57mm - 66mm)
          • One Pro_L: 69mm (Supported range: 66mm - 75mm)

        • How To: Double-click the X Button to bring up the menu > Display interface > IPD Adjustment interface, and use the +/- Button to adjust.

        • Once the edges of the image become clear and the entire display is shown, the IPD adjustment is complete.

        3. Reversal of Physical Buttons and Interface Mapping

        The default mapping between the physical +/- Button on the temple and the on-screen controls may feel less intuitive or smooth for some users, similar to how some users initially struggle with the default mapping of Apple's mouse. 


        To address this, a one-touch reversal feature is available to flip the mapping between the physical buttons and the menu interface.


        • Default Setting : The physical +/- Button are mapped to the interface as standard.
        • How To : Double-click the X Button to open the menu > Others interface > select Reverse Menu Direction, click the X Button to turn this feature on or off.

        4. Auto Transparent

        When using the second or third level of the electrochromic mode, or when the screen is in hover mode, enabling this feature will automatically make the surrounding environment transparent when you look away from the screen.


        • How To : Double-click the X Button to open the menu > Display interface > select Auto Transparent, and click the X Button to turn this feature on or off.

        1